Kilbourne Hole maar
Revised 20260116
Doña Ana County, New Mexico
East Launch 31.968833° -106.953967°,
4,360 MSL 440' AGL (main LZ)
"Main" LZ 31.971866° -106.963756° (Main in quotes because most people top land) Glide Ratio 6.6
Suggested rating requirements for East Launch: P2. Other locations along the rim not recommended.
RS recommended
When flown during thermic times/dates, TURB recommended
East Launch conditions Ideal Direction 225° - 245°, OK 220° - 270°, Min 7, Ideal 12, Max 15, Gusts 5 mph
Site Protocols / Rules
The maar is located within the Organ Mountains - Desert Peaks National Monument . However, it is not a wilderness area; much of the maar is owned by JC Ranches. Shooting and motorized vehicles are permitted.
Key Site Safety Information:
This Site will have strong thermals during the summer months which block winds coming in at East launch during mid-day. Best flying is late in the afternoon when thermals are light and winds at Launch are consistent. If flown outside of the normal 1.5 hours on either side of dusk and dawn there may exist the intense thermals that drift in from desert out front.
Kilbourne Hole has a dangerous hazard: If you get lower than launch at any time, head immediately towards the LZ (the bottom of the maar) or top land immediately. PILOTS MUST NOT
ATTEMPT TO LAND BETWEEN THE TOP OF THE RIM AND THE TOP OF THE BASALT CLIFF!
This is a serious and potentially deadly hazard because the area is strewn with huge boulders and small ravines. It is also very steep. This is to say nothing of landing near or at the top of the cliff, rolling down the incline, and then falling over the cliff. This would only happen if a pilot flies too far out in front of the rim and out of lift generated by the rim and does not want to head to the LZ.
General Info
This is the only soarable maar in the world for ultralights. This site was developed and first flown by Had Robinson for paragliding. Robin Hastings was the first hang gliding pilot to fly this site and helped develop it for hang gliding. However, it is almost never flown by HG because the road to the bottom is now impassable even for a highly modified 4x4s.
Soaring a maar is unusual because it can be flown with winds from various directions. A pilot can soar around the rim and find the "sweet spot" for that particular wind direction. However, this maar is a highly thermic site because of the abundance of black basalt around the rim. If a pilot wants to only ridge soar, the best times are early/late in the day or when it is overcast. If the winds are too high at launch, wait until 15-30 minutes before sunset and then launch. After sunset, the winds almost always die off near the surface. However, if a pilot launches at sunset and gets a few hundred feet high, he will be in the winds aloft and not be affected by the inversion and can soar until it is too dark to see.
The black basalt gets intensely hot and generates powerful thermals which, during the heat of the day, block the winds making soaring difficult, to say nothing of excessive turbulence. The bottom of the maar has lighter or non-existent winds so the LZ is always a safe bailout in case high winds are encountered at the rim. However, getting blown over the back of the rim is not an issue except that a pilot may get his glider in the bushes. The LZ is a huge (1/4 mile on each side) grassy/weed area that is free of obstacles. Please keep an eye out for the occasional drain holes (6" in diameter or so) that go from the surface to the lava dome deep in the earth. This is why the bottom of the maar never fills with water.
First time pilots should have a guide if they are not experienced P3's with mountain launch skills.
This site has some cell service at the top of the rim. If a pilot lands at the bottom of the maar communication with the outside world is only possible with a satellite telephone/communicator. For this reason it is hazardous to fly this site alone. Kilbourne is remote and is a "dark sky" site (no electric lights). Camping in the area is permitted.
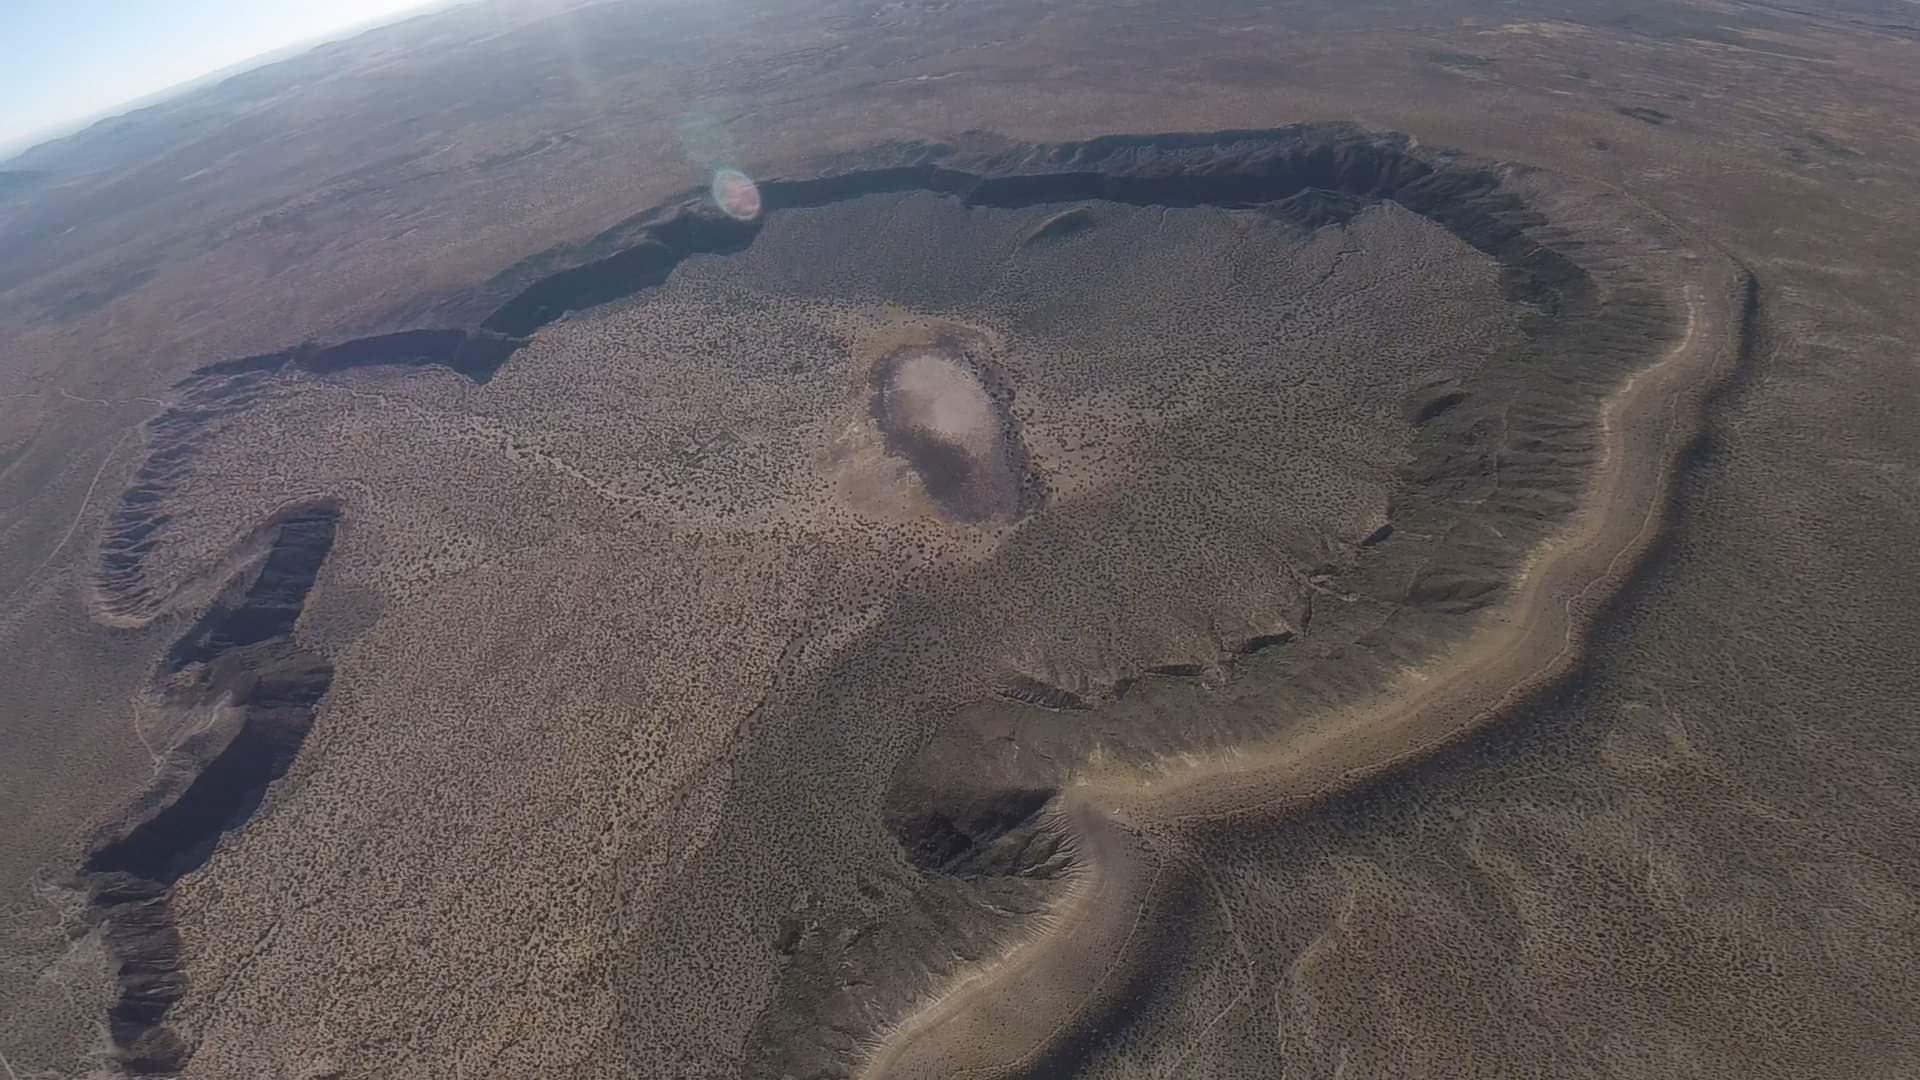
Thermalling above Kilbourne Hole maar. View is northeast. The black basalt cliffs are the source for the intense thermals at the maar. The pilot here first got up with ridge lift and then found a thermal out front to get even higher. East Launch is the point on the rim just to the right of the glider's risers.
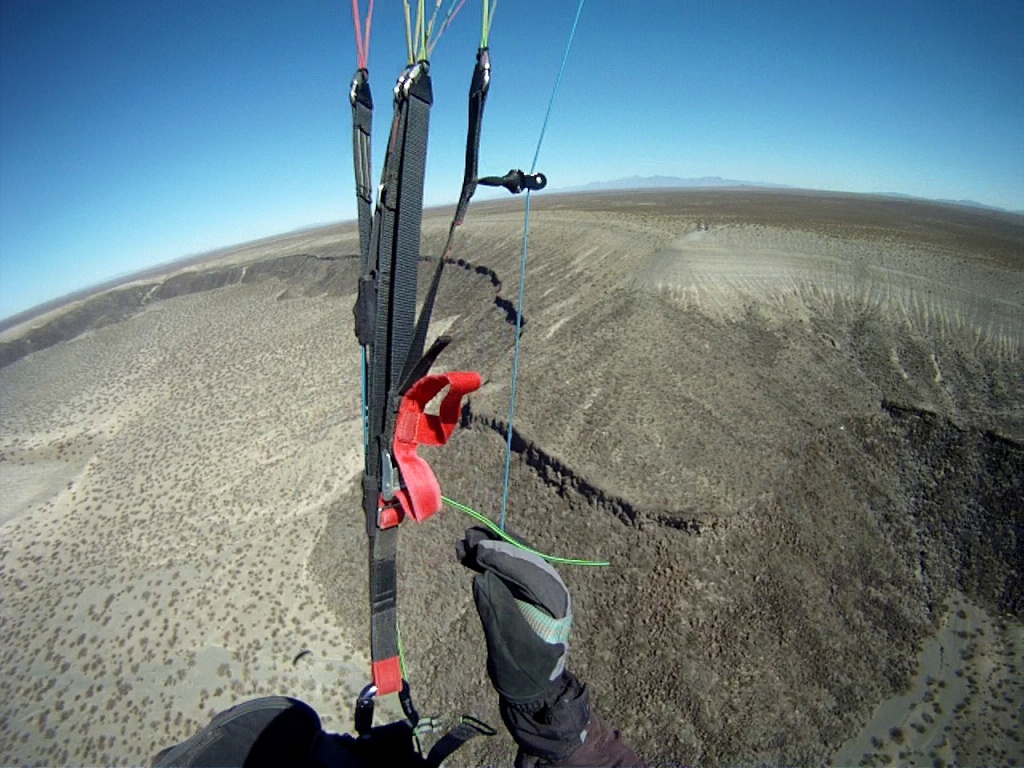
Photo: Hadley Robinson
Expectations for inexperienced pilots
Ideal winds are from 230º. Wind speed should be at least 8 mph and not greater than 14 mph. The site is not soarable with winds less than 8 mph.
Forward or reverse launches may be done safely at Kilbourne Hole.
The first launch at Kilbourne is often a "sledder" to the bottom of the maar. It is an easy glide to the main LZ. The only modest hazard for new pilots is to avoid the bushes that surround the huge grassy LZ.
If a pilot gets higher than launch, a top landing is easy and safe anywhere along the top of the rim. Because of the maar's geography, "going over the back" is a safe alternative to the main LZ (which requires a 40 minute hike back to launch). The only hazard of going over the back of the rim is the presence of a fence line approximately 100 yd. south of the main launch that runs east and perpendicular to the rim for about 1/4 mile. It is not common to soar to the south of launch.
Directions to Launch
East launch 31.968833° -106.953967°
There are two general ways to reach it from El Paso. One is best for high clearance vehicles and is a little shorter, the other is better for conventional cars and is longer, but has less miles on dirt roads and avoids potential mud-holes.
High-clearance route:
Turn off of Hwy 136 (Pete Domenici Hwy) onto Strauss Road and go to the end of pavement where it turns into A17. Continue on A17 until a stop sign (A20), make a right, then a quick left
and continue on A17. It is about 12 miles to A11. A11 is the first left past a dumping area of many piles of black rock on the west side of A17. Once on A11, go west 8 miles and arrive at the maar. Make a sharp right turn and go along
the outside base of the maar 3/4 miles. Cross a cattle-guard. Make a sharp left and follow the jeep trail about 0.3 miles. Then make a left turn and go 0.13 miles to
the top of ridge. The jeep trail up to the ridge from the base is 4-wheel drive ONLY. If your vehicle cannot make it, do not worry because you are just 100 yards from launch. At the top of
the ridge, make a left and go south 60 yards. You are at the East launch.
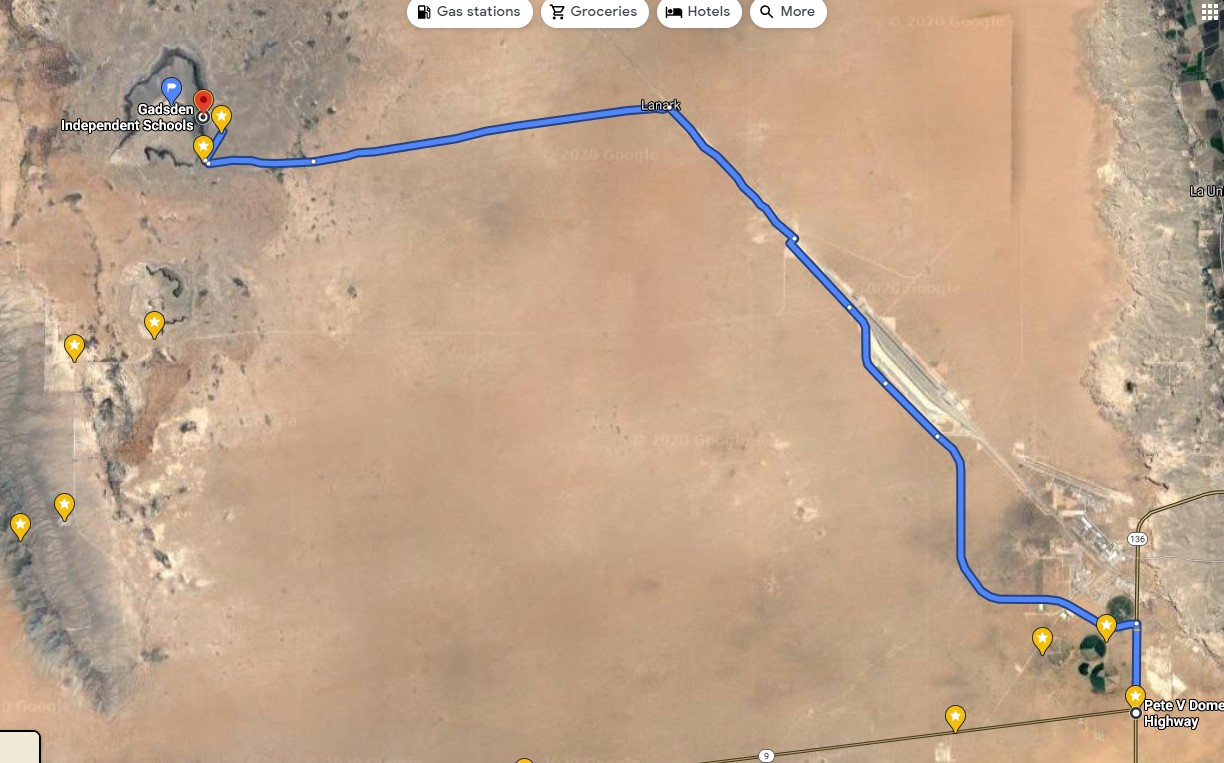
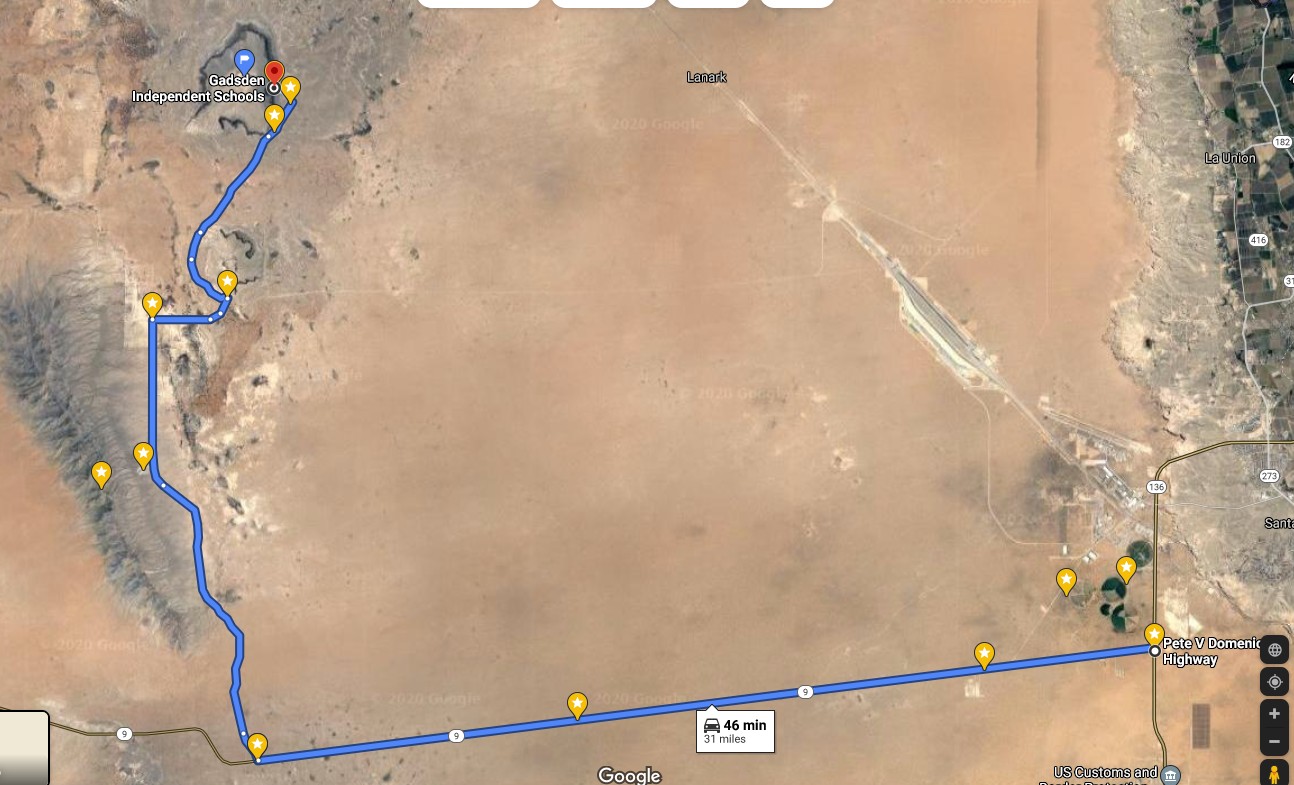
Conventional car route:
Head west on Highway 9 for 17 miles to County Road A08. Head north on A05 about 9 miles to A14. Head east on A14 about half a mile then turn left on a road that angles toward Hunt's Hole. Skirt Hunt's hole on the west side following A12 and A13 until you reach the south end of Kilbourne's Hole. Continue NNE along the East side of the hole until you pass the cattle guard. Make a sharp left and follow the jeep trail about 0.3 miles. Then make a left turn and go 0.13 miles to
the top of ridge. The jeep trail up to the ridge from the base is 4-wheel drive ONLY. If your vehicle cannot make it, do not worry because you are just 100 yards from launch. At the top of
the ridge, make a left and go south 60 yards. You are at the East launch.
Note: Taking a GPS along is highly recommended.
Launching
Pilots should stay just in front of the rim which is the area of maximum lift if altitude is less than 100' AGL.
If winds are less than 7-8 mph, plan on doing a sled ride as there is not enough lift to keep a pilot up.
Winds of 14+ will take the pilot to at least 200' over launch. Once a pilot gets 200'+ AGL, the lift zone gets much wider, laminar, and more consistent. It is thrilling to soar a maar as a pilot can safely explore the limits of the lift in either direction. If you do this, however, be prepared to top land at any time.
Top landing is easy anywhere around the rim as it is clear of obstacles and rotor due to the topography of a maar.
East Launch
The East Launch (photos below) is the best because:
- It is the
highest part of the rim with the correct topography to give the most lift.
- The prevailing winds are
from the southwest which gives this launch the advantage.
- It works well with winds from the southwest to the northwest.
- Launch from the northerly part of the launch area.
- Always turn to the right and work the northerly 1/2 mile of the rim. Once you are 150' or so above launch, you can explore the rim as far as you can find lift, including flying south of launch.
It can even be flown with winds from the south but the soaring range is only about 75 yd. – a good challenge as the pilot must be constantly turning back and fourth. It is better to use the northwest launch if winds are south southeast to southeast.
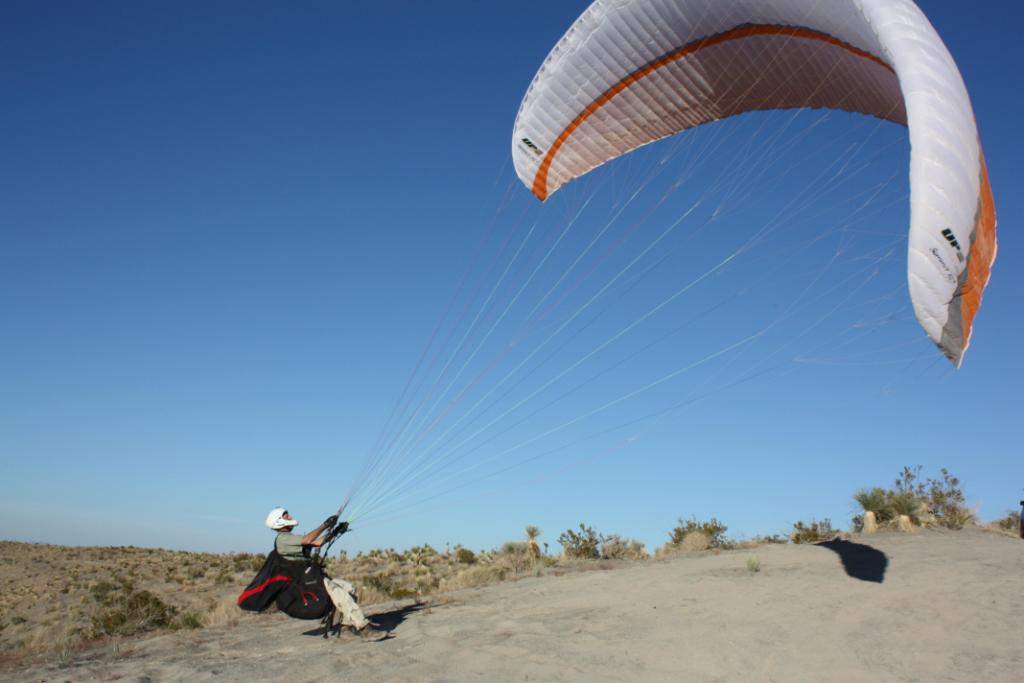
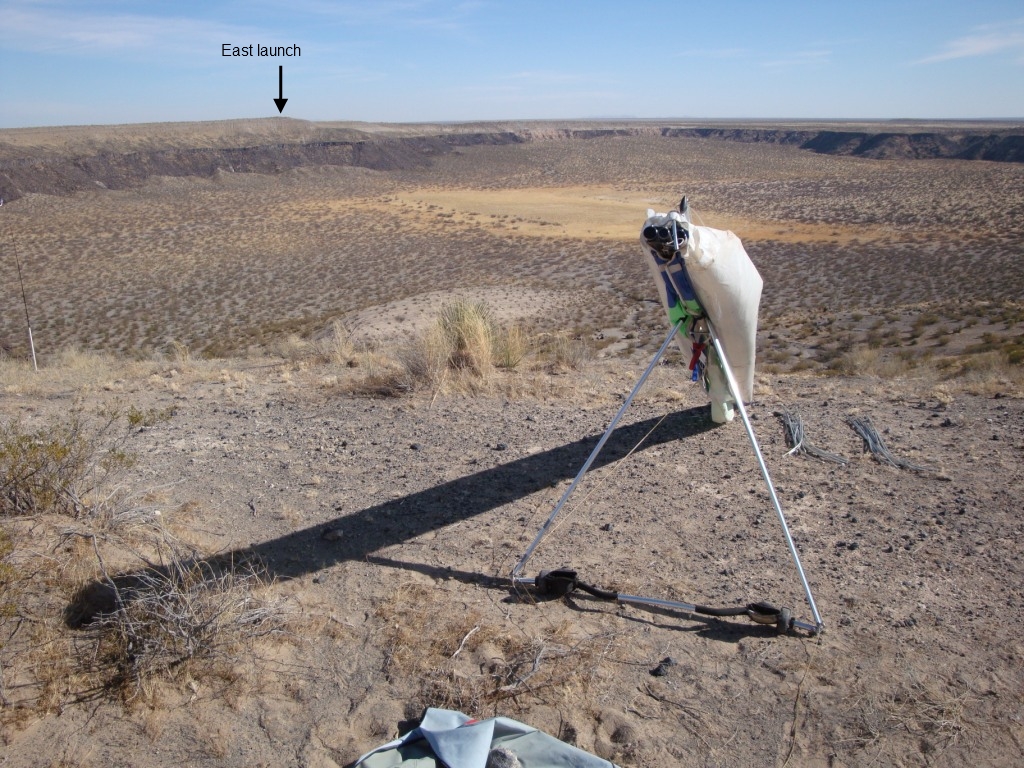
Hadley Robinson inflates his wing on the East Launch. Winds were strong
that day and everyone got up!
The east launch can be easily flown by H/P2's as it is the closest to the LZ and an easy and safe sled ride.
Pilots should turn to the right after launching unless planning a sled ride to the bottom. The East Launch is a point sticking out into the maar. Other launch sites around the rim (depending on wind direction) require advanced skills, especially spot/side hill landing expertise, and are rated H/P3. A cliff launch rating for those alternate launches would be highly advisable.
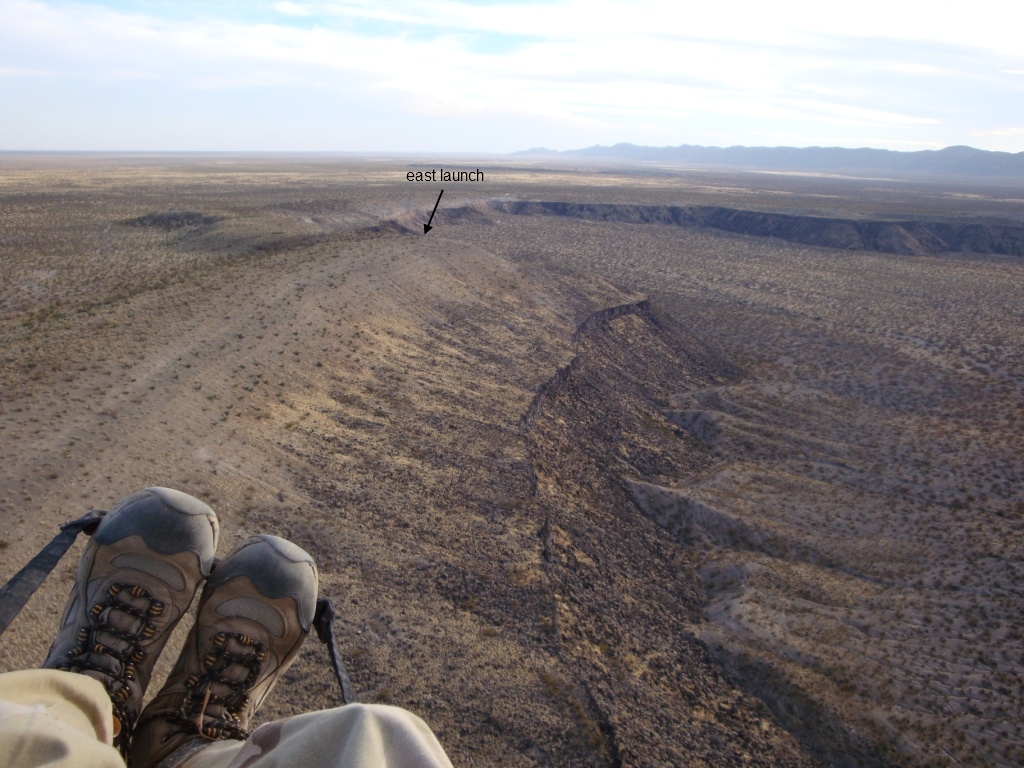
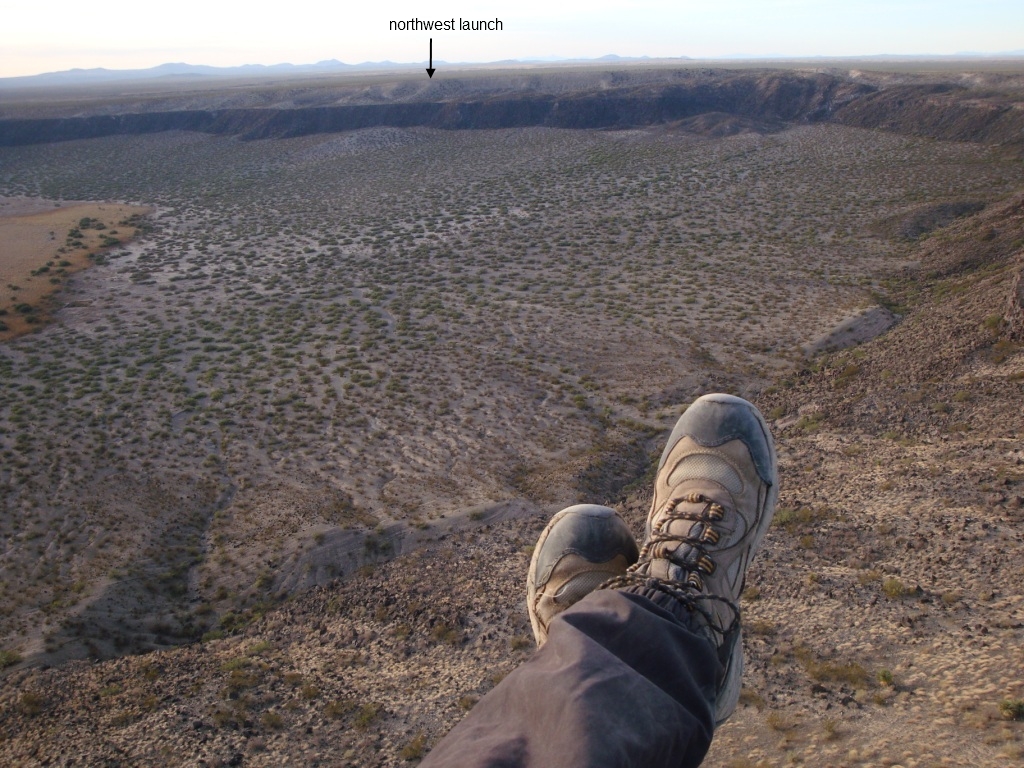
East Launch is about a mile in the distance. Note that it is a somewhat
overcast day. When the sun is out, abundant thermal blocking of the
winds at launch occur and it is harder to soar but easy to catch thermals.
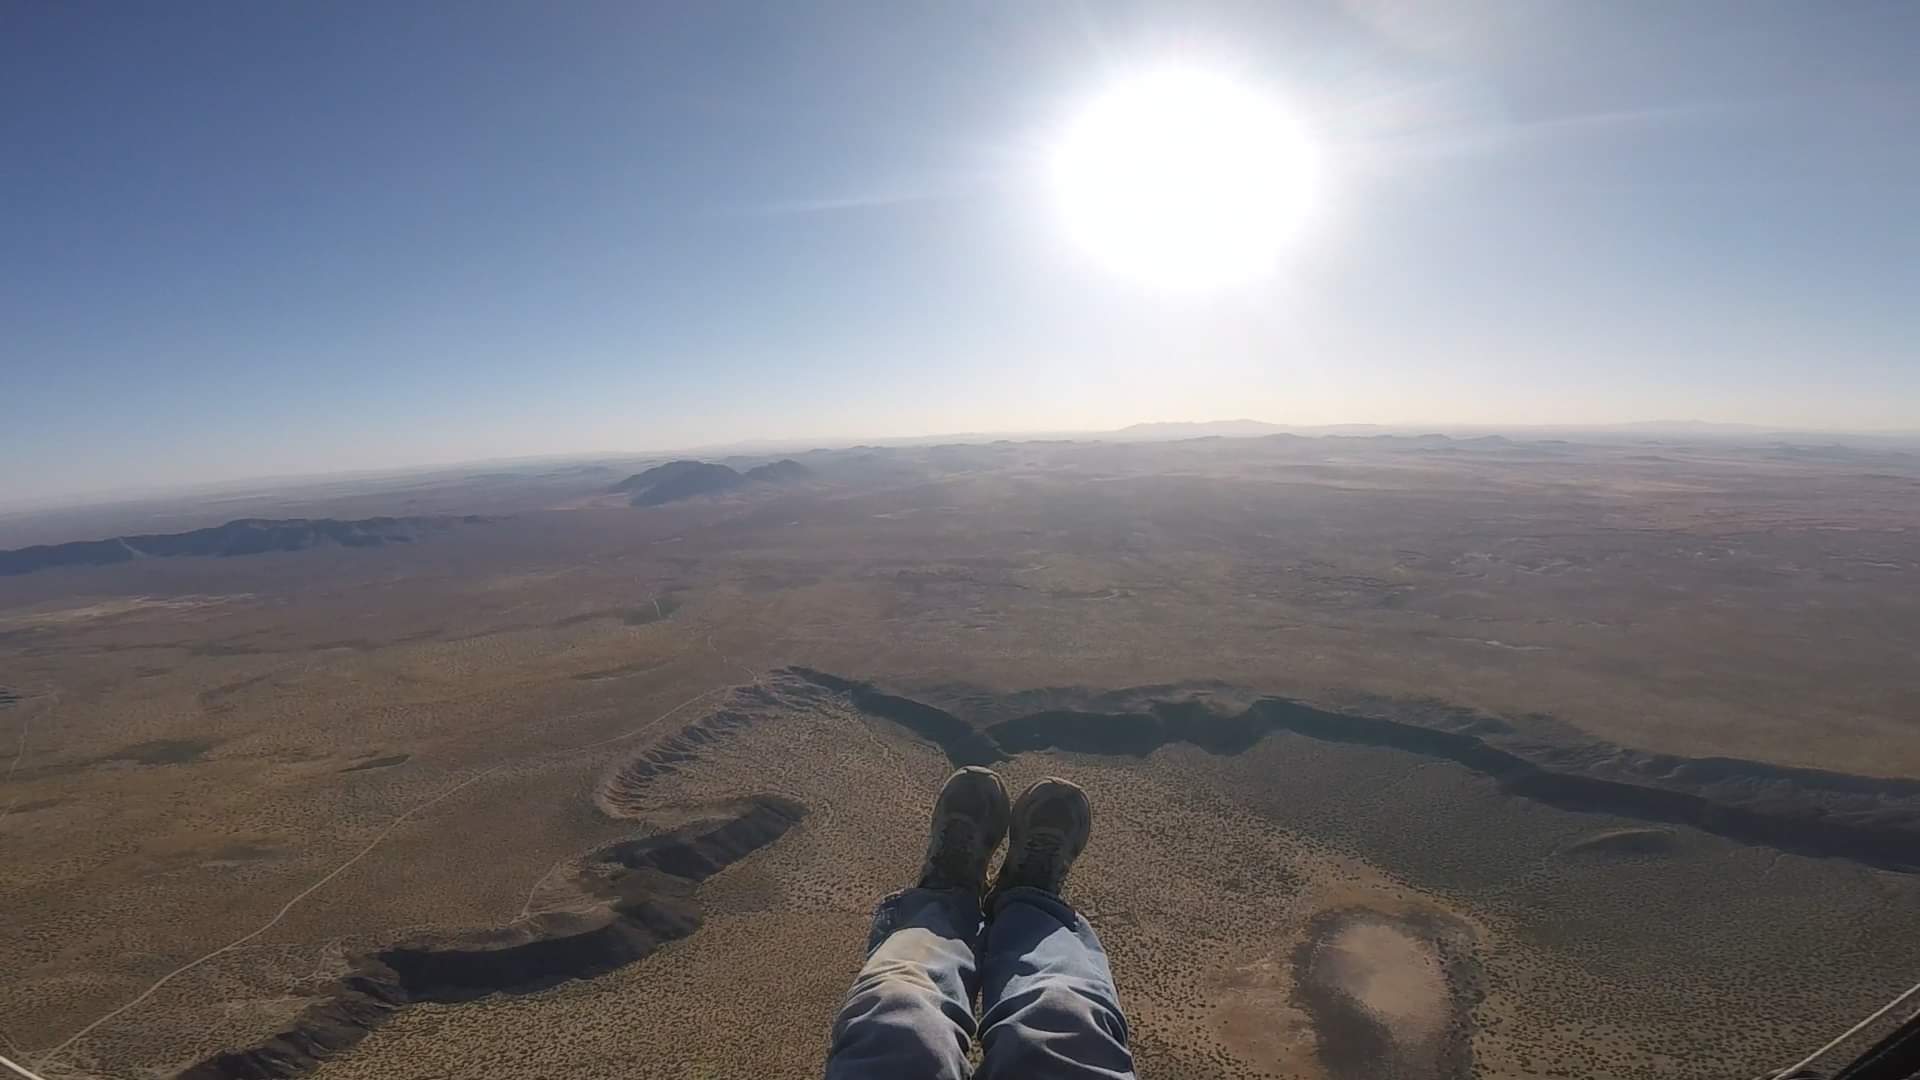
Below are frame grabs from Mitch Graham's record setting thermal flight in the summer of 2020. His vario was malfunctioning, but notice that he is considerably higher than Mt. Riley. We estimate about 2500' over launch.
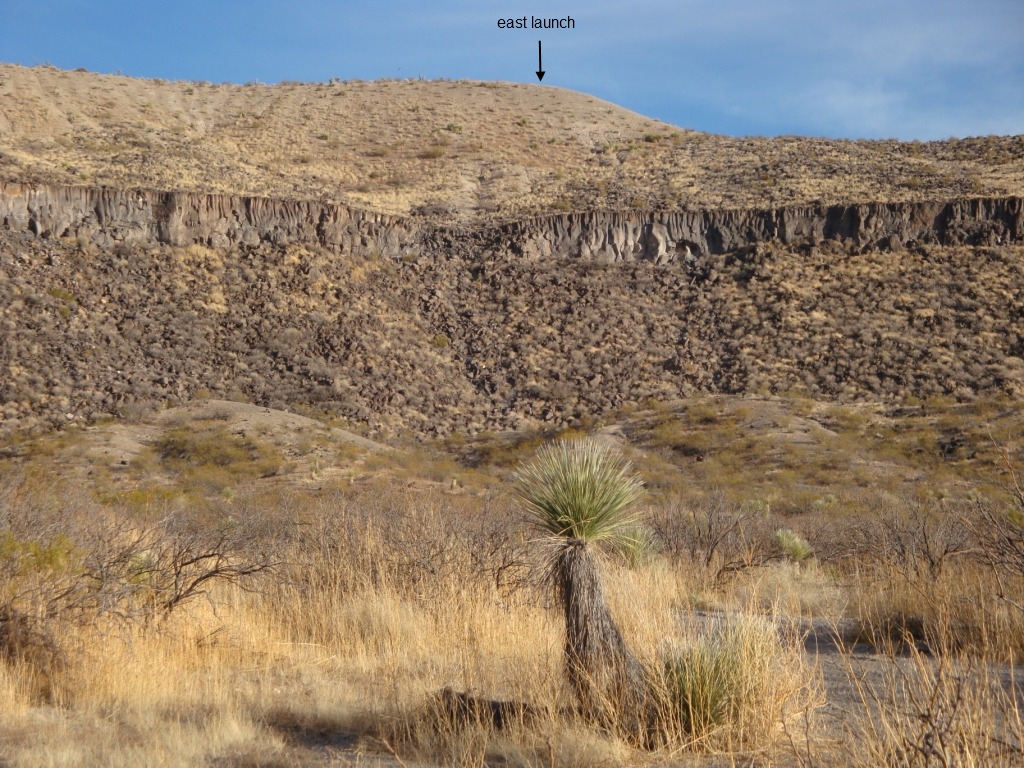
View of the east launch from the bottom of the maar
LZ
The "LZ" (note that most pilots top land) is a 1/4 mile in diameter, flat, and without significant obstacles. The road to the bottom is impassible. Pilots can always hike back to launch with their gear which takes about 45 minutes. Note there is one spot when climbing up the only easily available crack in the basalt cliff where one could slip and fall about 10' and experience serious injury. It is advisable to wear your helmet when moving through this area and proceed with extreme caution. ALWAYS FLY WITH A PACK BAG IN CASE YOU ARE FORCED TO LAND AT THE BOTTOM AND HAVE TO HIKE OUT

View of the LZ (light area) from East Launch. It is a 1/4 mile
in diameter, flat, and easy to land it.
Winds and Conditions
Southwest winds (prime direction)
When winds are southwest it is the best. This is because the higher parts of the rim are located in the northerly half of the maar. As SW winds advance towards the maar, they flow down a broad canyon that is located southwest of the East Launch. The winds fill the maar and are pushed towards its northerly rim. This generates the maximum and turbulent free lift we experience under these conditions.
West to northwest winds
Soaring is possible with winds from the west or northwest. Lift is about half of what it would be with southwest winds because the air that spills into the maar mostly exits the southerly rim which is much lower. As a result, less air is forced up and over the northerly section of the rim. The air is also more turbulent because it spills over the higher parts of the rim and tumbles down into the center of the maar. The air is in a disturbed state when it reaches East Launch.
Additional Info
No one has yet gone XC from Kilbourne Hole maar.
Kilbourne Hole is one of just a few places in the world where the
mineral Green Peridot (an
olivine crystal) can be found on the surface of the earth. However, the mineral found here is not of particularly good quality due to the very rapid cooling of the maar's material after its
eruption.
Southwest of East Launch, about 50' below, is a small canyon and hill that is behind the basalt cliff. If a pilot is ridge soaring the southwest face of East Launch in weak conditions and drops below launch, he should stay clear of this area. There is significant rotor behind the small hill at the base of launch and he will quickly sink out. Side hill landing, however, behind the canyon and at the base of launch is possible but there are boulders close by. Landing in this area requires advanced skills. A better and safer place to side hill land is more south of launch. A side hill landing in this area is easy and much safer. It is important for the pilot to always be aware of weakening conditions and be prepared to immediately side hill land or go to the LZ.
Always be sure to put your pack bag in your harness. You cannot safely hike out of the maar carrying a loose glider. You must have both hands free to safely climb up the basalt cliff.
If you fly near dusk, carry a headlamp so you can see your way, especially through the crack in the basalt cliff that is near the base of East Launch.

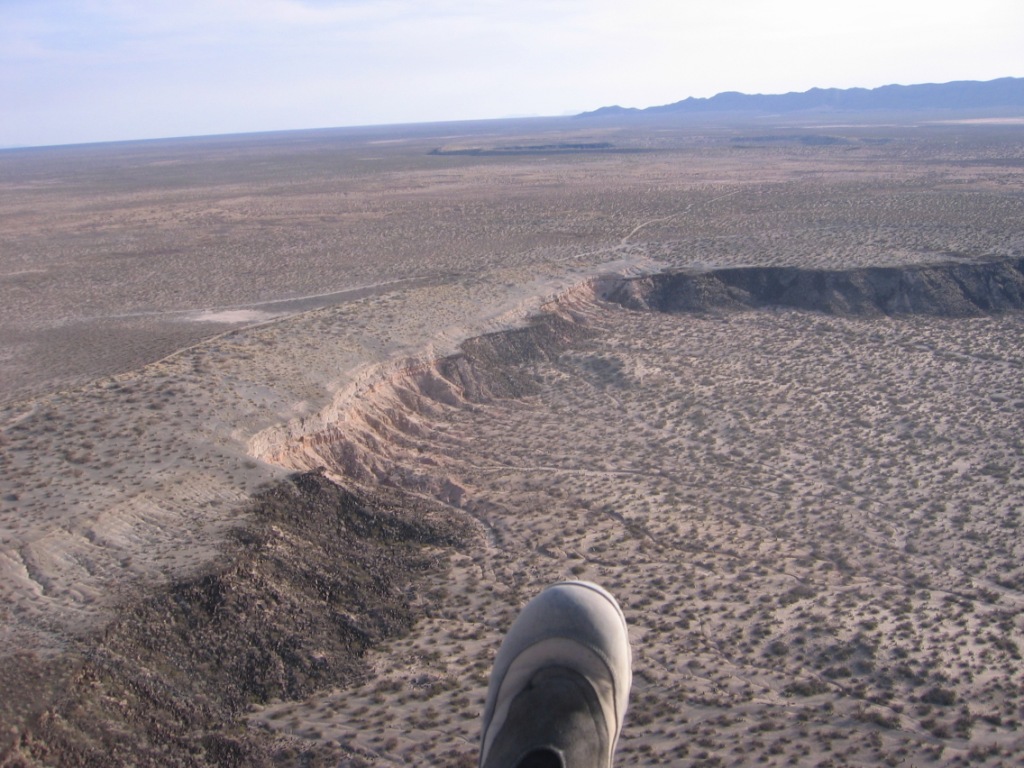
Flying along the northeasterly section of the rim. Winds were WSW
at around 12 mph. East launch is behind the pilot.
Soaring high above the east rim of the maar. The LZ is just
visible to the left.
 Soaring 600' over. Launch is directly
below. The winds this day were southwest at 15 -18 mph at launch. View
is south.
Soaring 600' over. Launch is directly
below. The winds this day were southwest at 15 -18 mph at launch. View
is south.
Northwest launch looking southwest. Robin Hastings is just getting
ready to launch his hang glider – he is the first to fly a hang glider at
the maar.
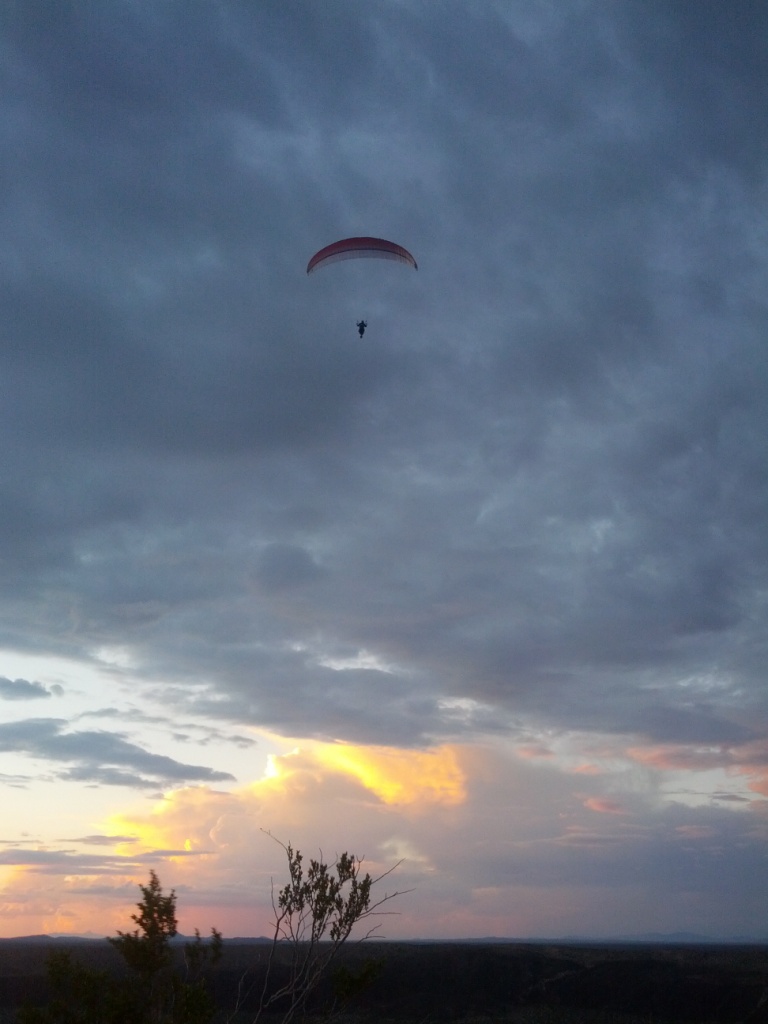
Brad Gray enjoying dusk at the maar out in front of the east launch –
it's a magic time.